I have heard of strudel... but to be honest, I have never really been sure exactly what it was? I imagined some kind of pastry.. in my mind it was a German or Dutch thing... not really certain of any more details beyond that. Even having gone to pastry school.... it wasn't something we learned about so I still had no idea what it was and never thought much about it.
While visiting with my friends David and Hanna recently, the topic of strudel came up (as I'm sure it does often for you, right?). It is something David grew up with. His dad used to make it all the time and, in turn, he learned to make it. I was so intrigued by it. When he described what it was... and, oh my, how you make it... I found it all so fascinating.
Upon discovering that friends of mine often made authentic strudel, I managed to persuade them to come on over to my house and show me how it's done..
Ingredients for the dough per David... as you can see, it's not terribly "exact"....
- "a big bowl full" of good hard wheat white flour (bread or all purpose) - this works out to be about six cups that are just scooped out of the flour bin, no sifting or other fancy stuff
- "a tiny bit of salt" - something between 1/4 and 1/2 of a teaspoon of NaCl
- "a tiny bit of oil" - I tend to use about 1 tablespoon full, although dad assures me that 1 teaspoon should do
- almost to hot to touch water
:
 |
| Ingredients for the Dough... Flower, egg, salt, water & oil |
 |
| Knead water and flour together to make a stiff dough. |
 |
Add salt after about 10 minutes of kneading.
|
 |
| Add oil after another 10 minutes of kneading |
 |
Keep kneading for another 10 minutes - you should have a nice stiff lump of dough about the size of a small cantaloupe or a large grapefruit. Wrap in plastic wrap and let sit on your counter for a couple of hours or over night
THE FILLING....
|
APPLES! LOTS AND LOTS OF APPLES!
Oh, and some other ingredients for the filling as well... :)
 |
| brown sugar, walnuts, cinnamon, nutmeg, butter (salted), dried cranberries and dried apricots |
 |
| A LOT of apples were peeled for this event... and cut into tiny, tiny, tiny pieces |
 |
| You need a very large work surface (at least 3' x 5') to work on. Cover the surface with a clean sheet and lightly dust with flour. This gets VERY interesting later on... |
 |
| And now you begin working the dough... you have to gently stretch the dough very thin... so thin you could just about read through it! This is David... beginning to stretch the dough. |
 |
| More stretching... |
 |
| And more stretching... |
 |
| And now stretching to the point of needing two people! |
 |
| It is important to work slowly and gently with the dough so it stretches very thin but doesn't break. A skill David has obviously mastered... |
 |
| And now the yummy goodness of the filling... Apparently, you can fill a strudel with all kinds of filling... they can even be savory (mushrooms, cheese, etc.)... We went the apples, fruit and nuts route... very traditional and really, really tasty |
 |
| See how tiny the apples are chopped? |
 |
| Here the strudel is with all the filling in place and ready to roll. After adding the fruit and nuts, we sprinkled some brown sugar (we didn't measure but were fairly conservative with the sugar... much less than you would include in a cinnamon roll)... and then several pats of butter throughout. Other strudel recipes call for brushing the dough with melted butter... David's family uses the pats of butter and they melt into the filling just like a rustic apple pie:) |
 |
| Close up of the filling.... |
 |
And now he begins to roll the strudel.. first, he gently tucks the edge of the dough
over the filling and begins the roll... |
 |
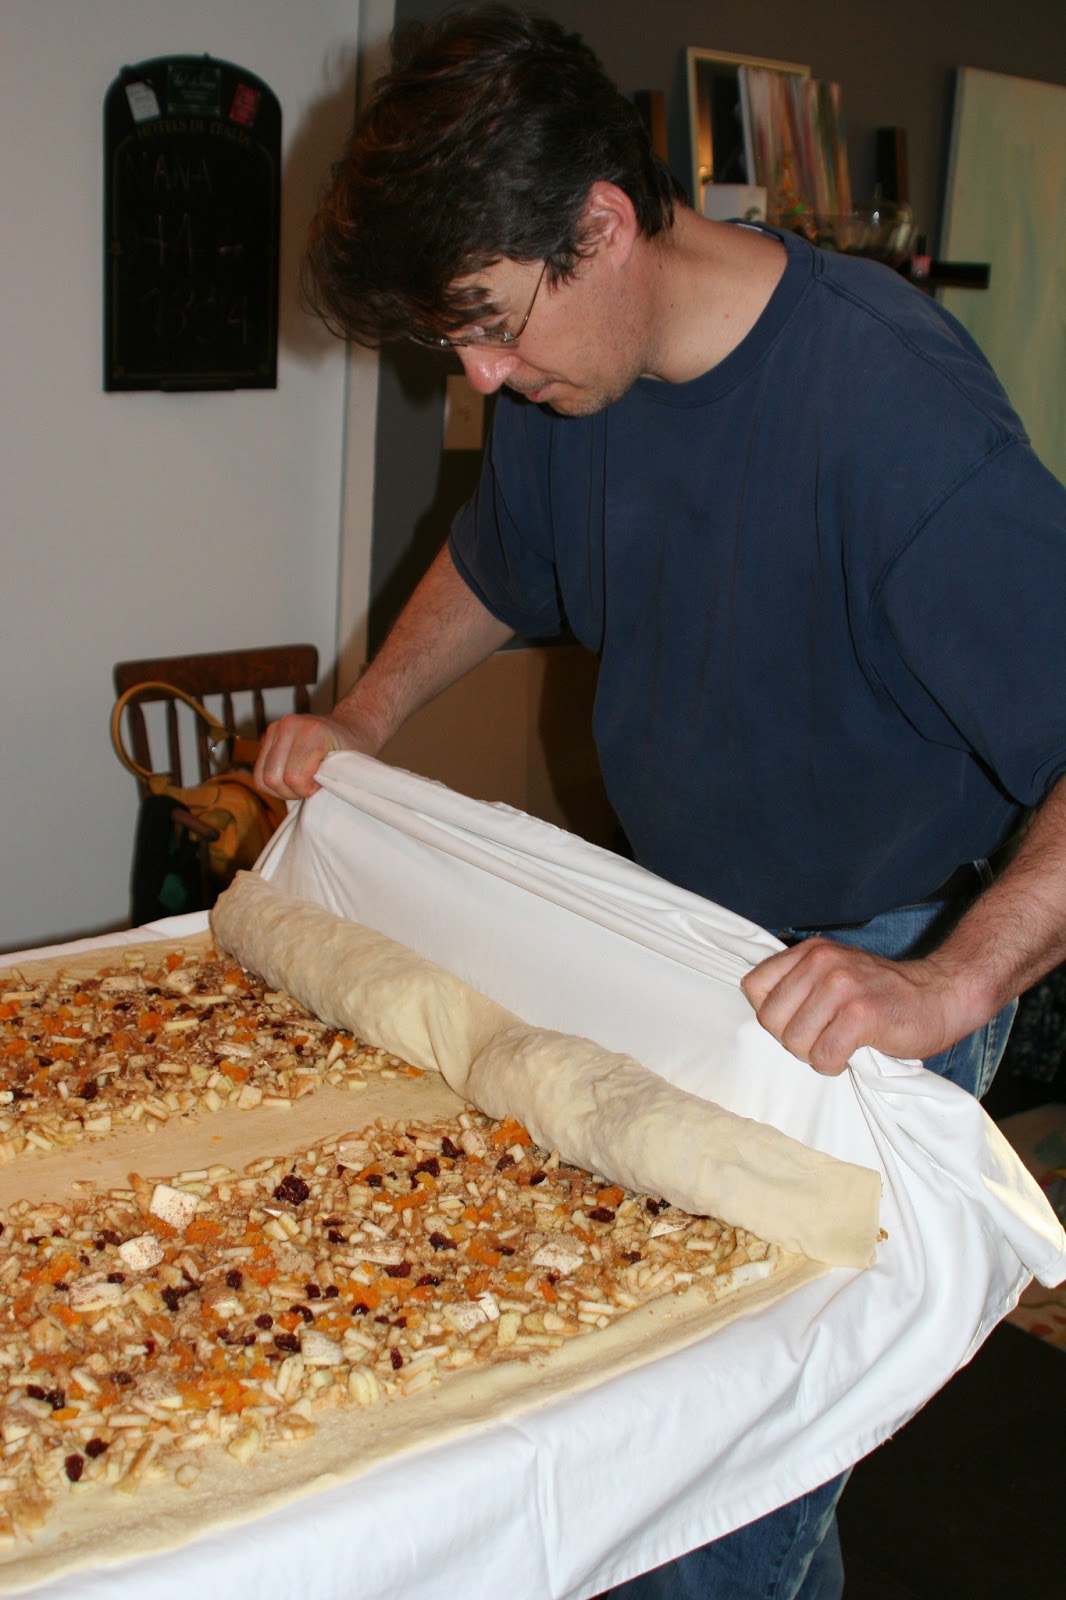
| After securing the beginning of the roll, David picks up the sheet and gently allows the strudel to roll itself! I really wish I had gotten video of this part... it was truly fascinating.. and very quick! |
 |
| More rolling... |
 |
| And more rolling... |
 |
| Until you get to this point... |
 |
| Pull the end up and pinch,tuck securely to the strudel. Cut down the middle to separate the two strudels and secure all of the ends. Some people trim the excess dough off of the ends before pinching it closed, but David and his family rather prefer the doughy end as it's own unique snack once it's baked.. I must agree, those baked doughy ends were tasty... |
 |
| This part was kind of amazing as well.. It's hard to tell just how large these rolls were, but there were pretty big... and filled to capacity with the yummy filling. so how to get them on the pan??? Place the baking sheets behind/under the edges of the rolls (note that the baking sheets are covered with parchment paper)... pick up the sheet on the other end and..... |
 |
Flip those puppies onto the baking sheets! Simple, right? (I never would have
thought of that on my own... |
 |
| A very dramatic moment as the strudel gets flipped onto the baking sheets. |
 |
| Aren't they gloriously grand? I was told that trimming the excess dough from the ends is traditional, but David prefers to leave them on and "gnaw" on them after baking as an added treat... to me, it was a bonus worth waiting for :) |
 |
So here is strudel number one fresh out of the oven...
smells amazing! |
 |
The second one had a bit of a mis-hap, but was still super tasty none-the-less...
I kind of liked that is was imperfect in such an amazing way... |
 |
The inside of the freshly cut strudel..
doesn't that look amazing? |
 |
Plated and served with vanilla ice cream... it was A M A Z I N G!
A Big THANKS to David and Hanna for sharing this experience with me... it was so much fun and the end result was definitely worth the effort!
|


How fun! The strudels look delicious!
ReplyDeleteMmmm! Now I want to eat strudel again.
ReplyDeleteHanna, I had the exact same response!
DeleteUhm, somewhere in there, the adding the egg to the dough got missed.
ReplyDeleteIt sure did! And I even had to go and search for that photo specifically... hmmmm... also, since I've got you here ;).... what is the quantity for the water? Thank!
DeleteYou ask good questions! Sadly, I haven't an answer for you other than enough. I start with a cup or two of water and then just add water bit by bit until the dough starts to form up then stop and see if I need to add more as I keep kneading it. I tried to quantify the water amount some time back, but learned it depends on the flour, the strength of the kneader, the phase of the moon and the number of comets the sun melted in the past 100 years. Then I gave up and just go by eyeball and dough texture.
ReplyDeleteNow I am hungry for strudel!?!
ReplyDelete